Using a free account with Zapier, you can integrate SalesNexus with thousands of apps that you use every day.
Today we’ll be showing you how to automatically create a new task for a member of your team in SalesNexus CRM when an invoice gets paid in the accounting software Quickbooks.
This can alert them in real time when an invoice is paid, what it was for, and how much they paid, so that they aren’t waiting around to be notified, and can take the appropriate next steps.
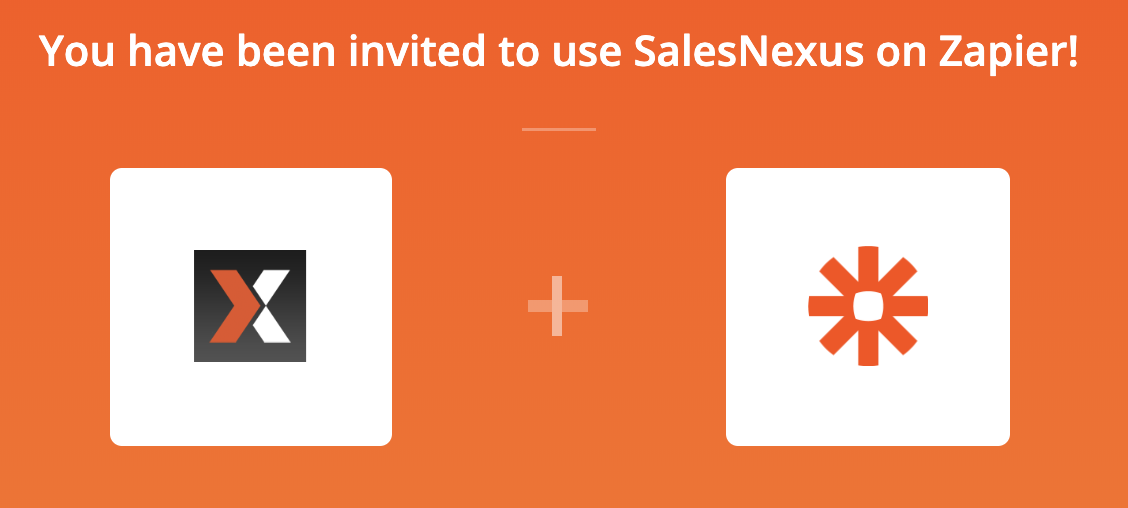
First, you’ll need to create an account or login to your existing account in Zapier, and accept our custom invite by clicking on the zapier logo here:

SalesNexus wants to invite you to our Zap on the platform Zapier! Click here to accept this invitation: SalesNexus Zapier Invitation!
Once you click the invitation link and login to Zapier, you should see the following:
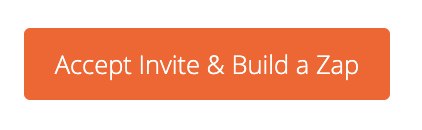
Click “Accept Invite & Build Zap
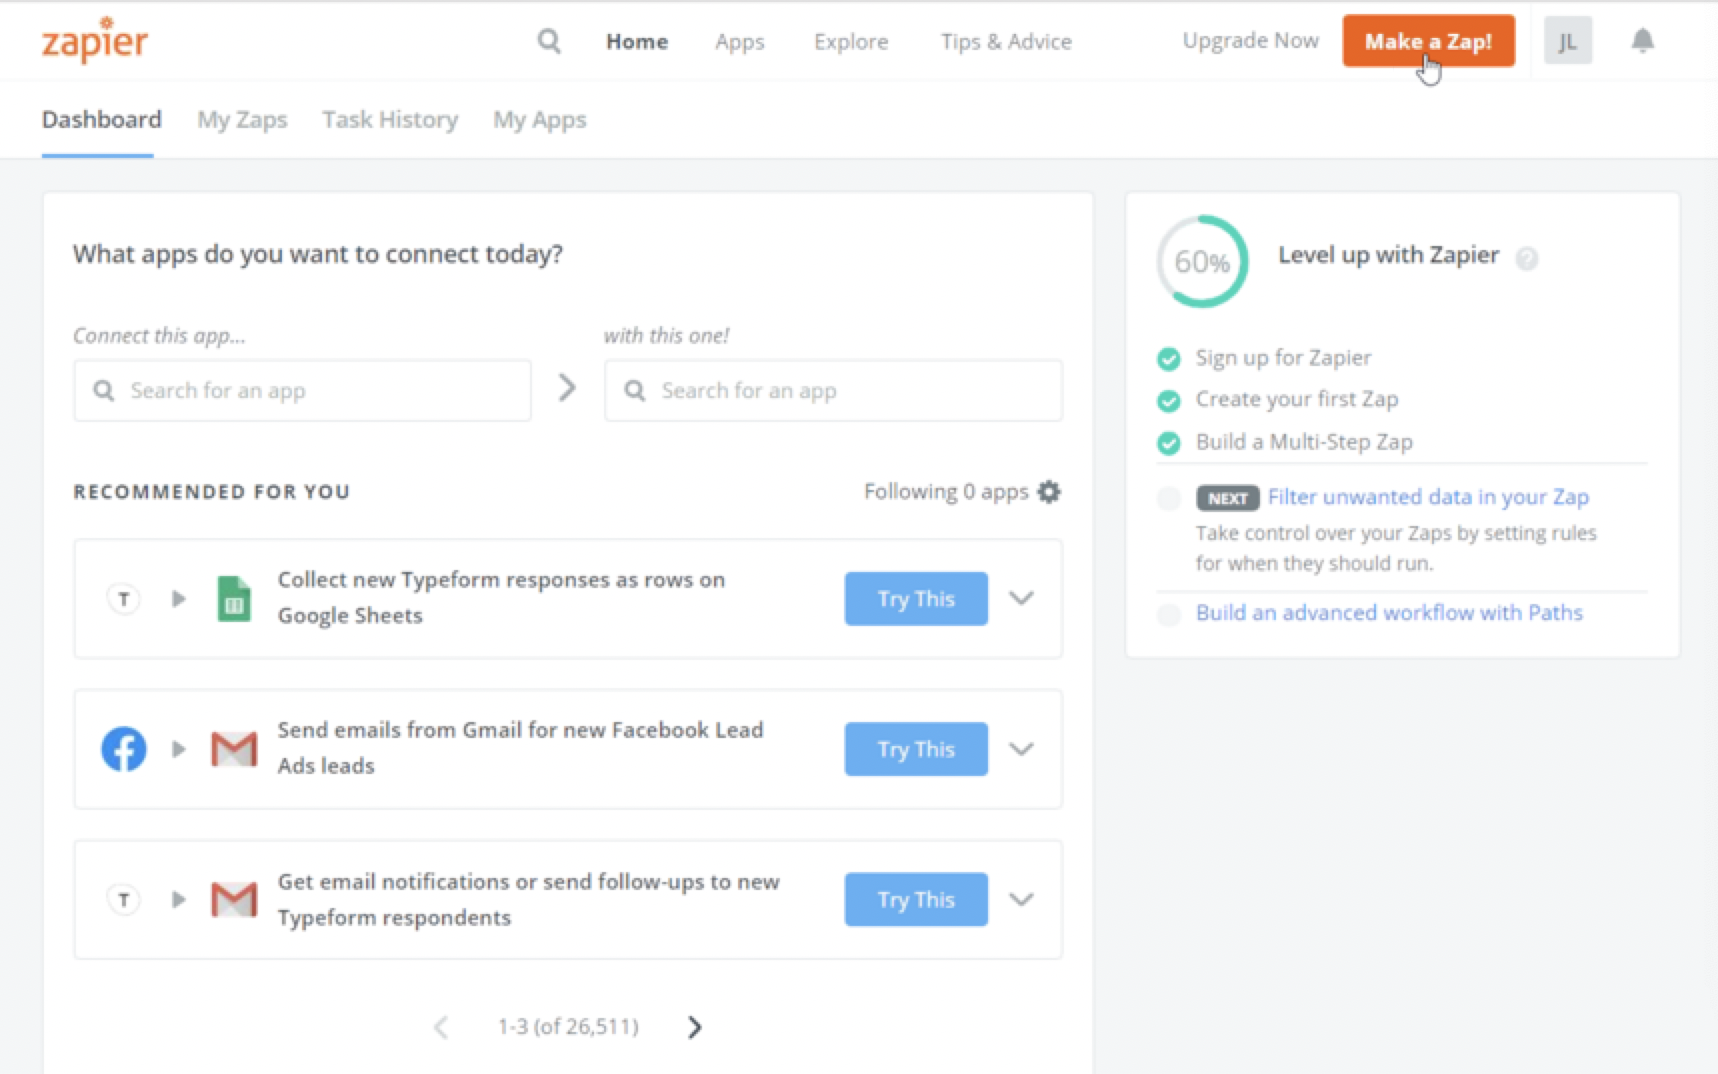
Click “Make a Zap” in the upper right hand corner
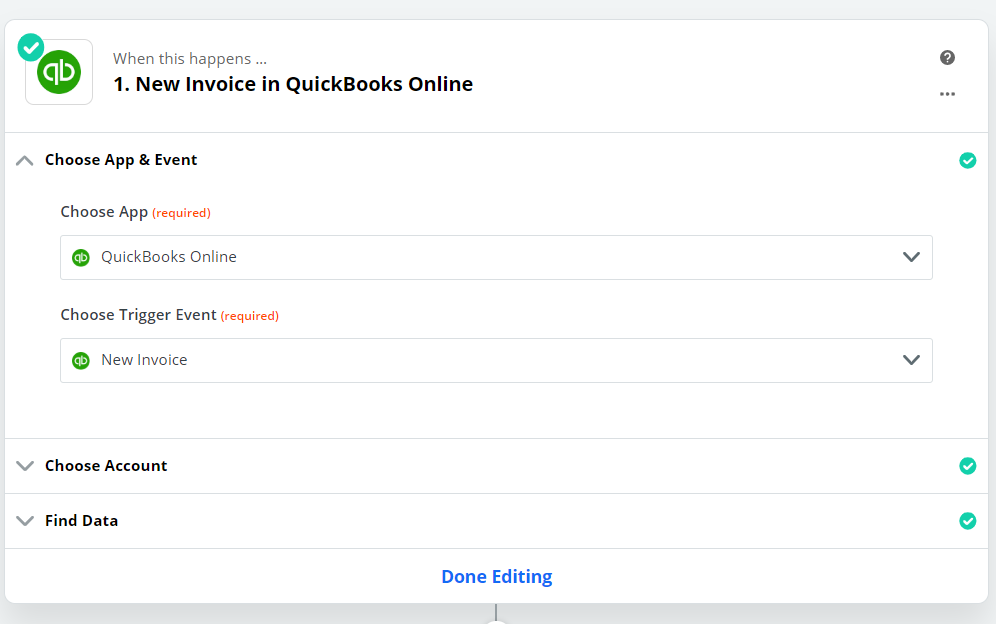
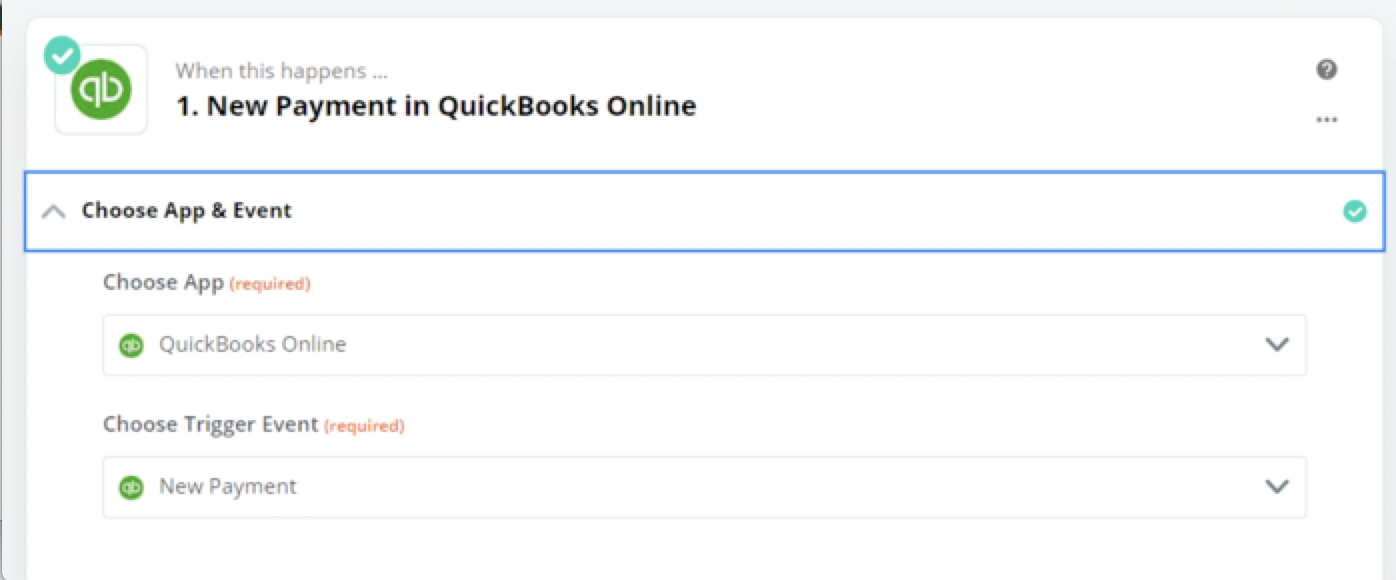
Choose the Quickbooks App and Trigger Event “New Invoice”
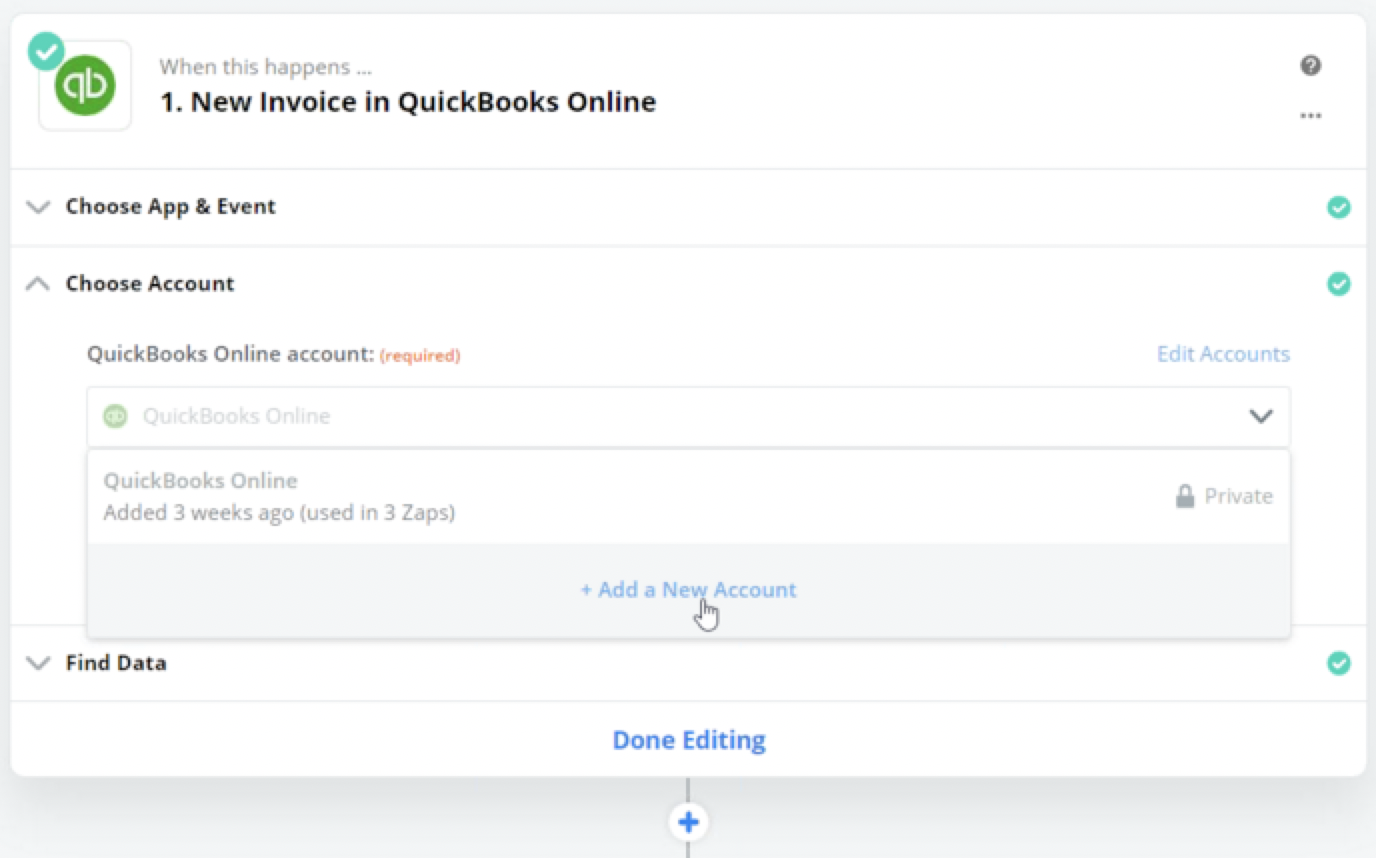
Choose your Quickbooks online account or “Add a New Account”
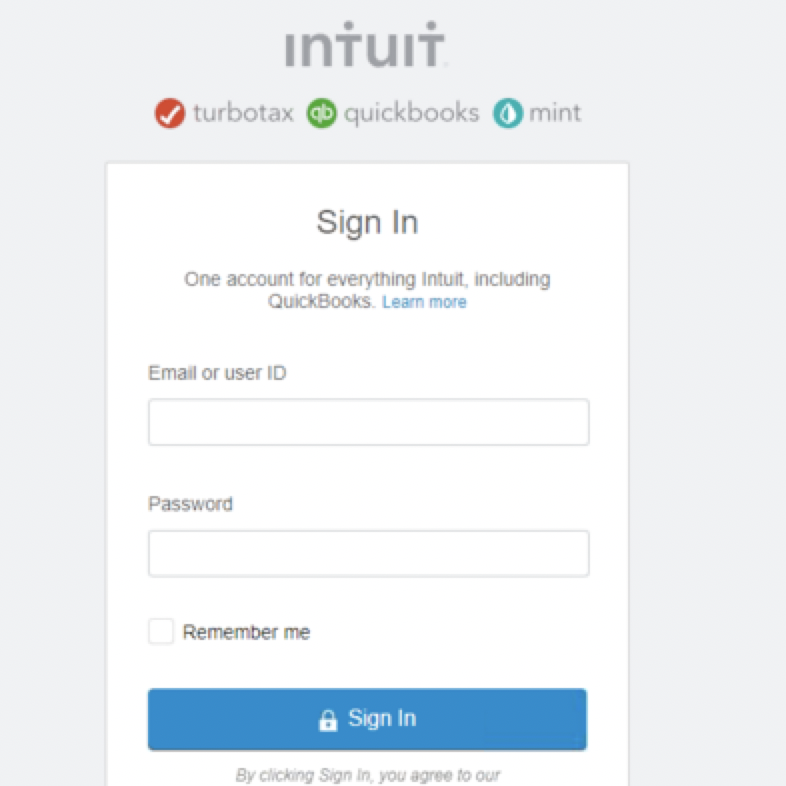
Enter Your Login Credentials for Quickbooks and click “Sign in”
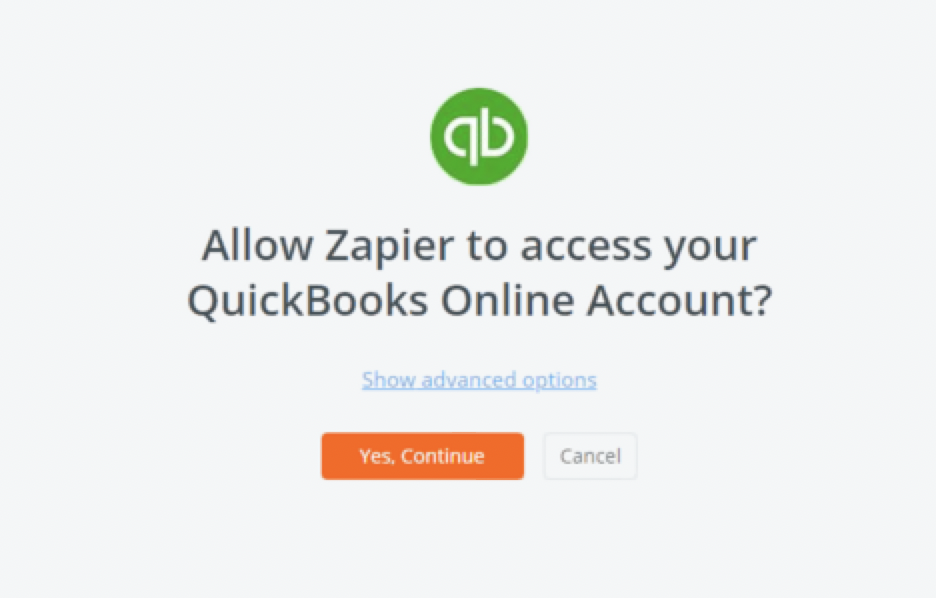
Confirm that you want to allow Zapier to connect your Quickbooks account by clicking “Yes, Continue”
Once your Quickbooks account is synced, you will have the option to automatically test for new invoices/data. For now, you can click “Skip Test” to move to the next step and do this part later.
Now you want to set up what happens in SalesNexus once an invoice is paid in Quickbooks.
- Under “Choose App & Event” search for SalesNexus.
- Then under “Choose Action Event” choose “New Payment”
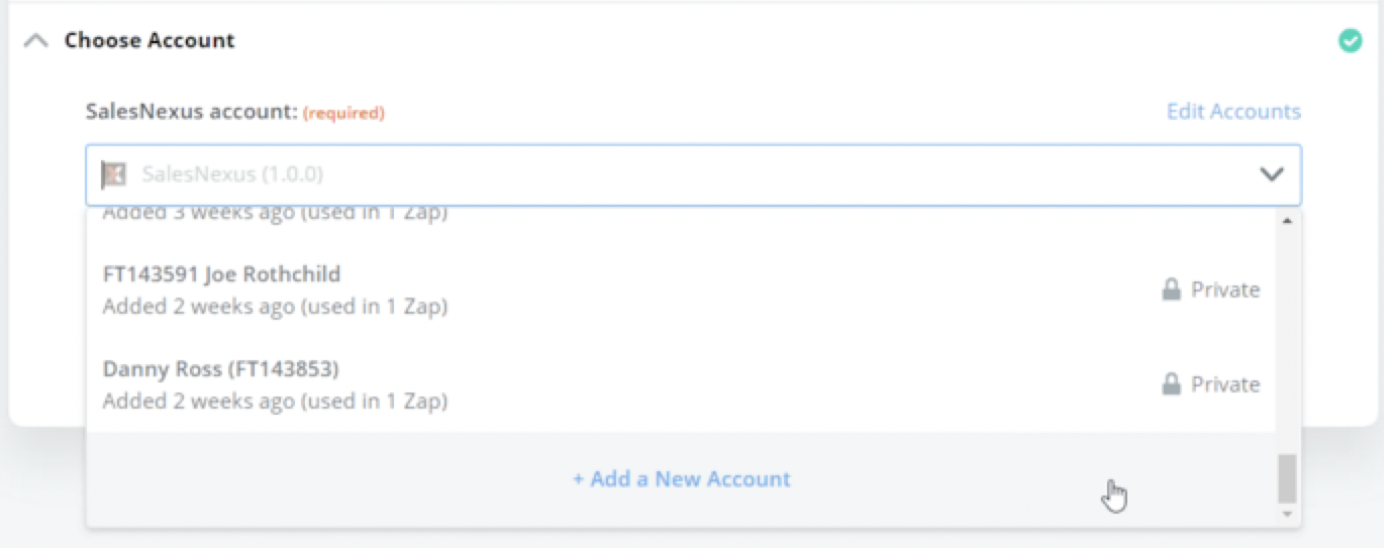
Next, you’re on to Step 2! Choose your SalesNexus account by clicking “Add a New Account”
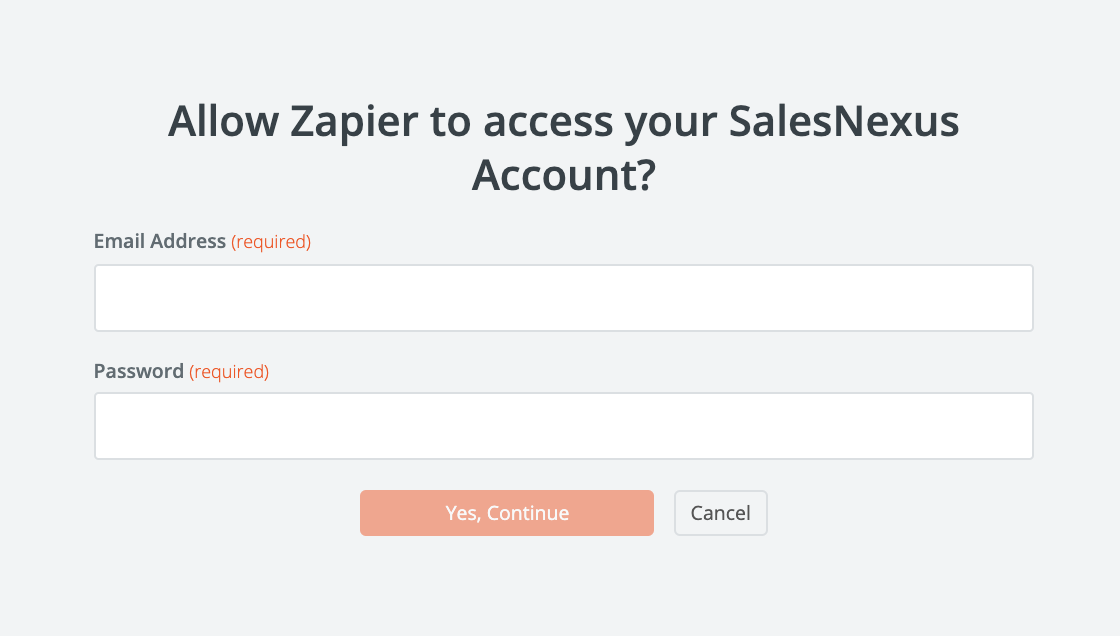
Enter in your SalesNexus login credentials, and submit the information by selecting “Yes, Continue”.
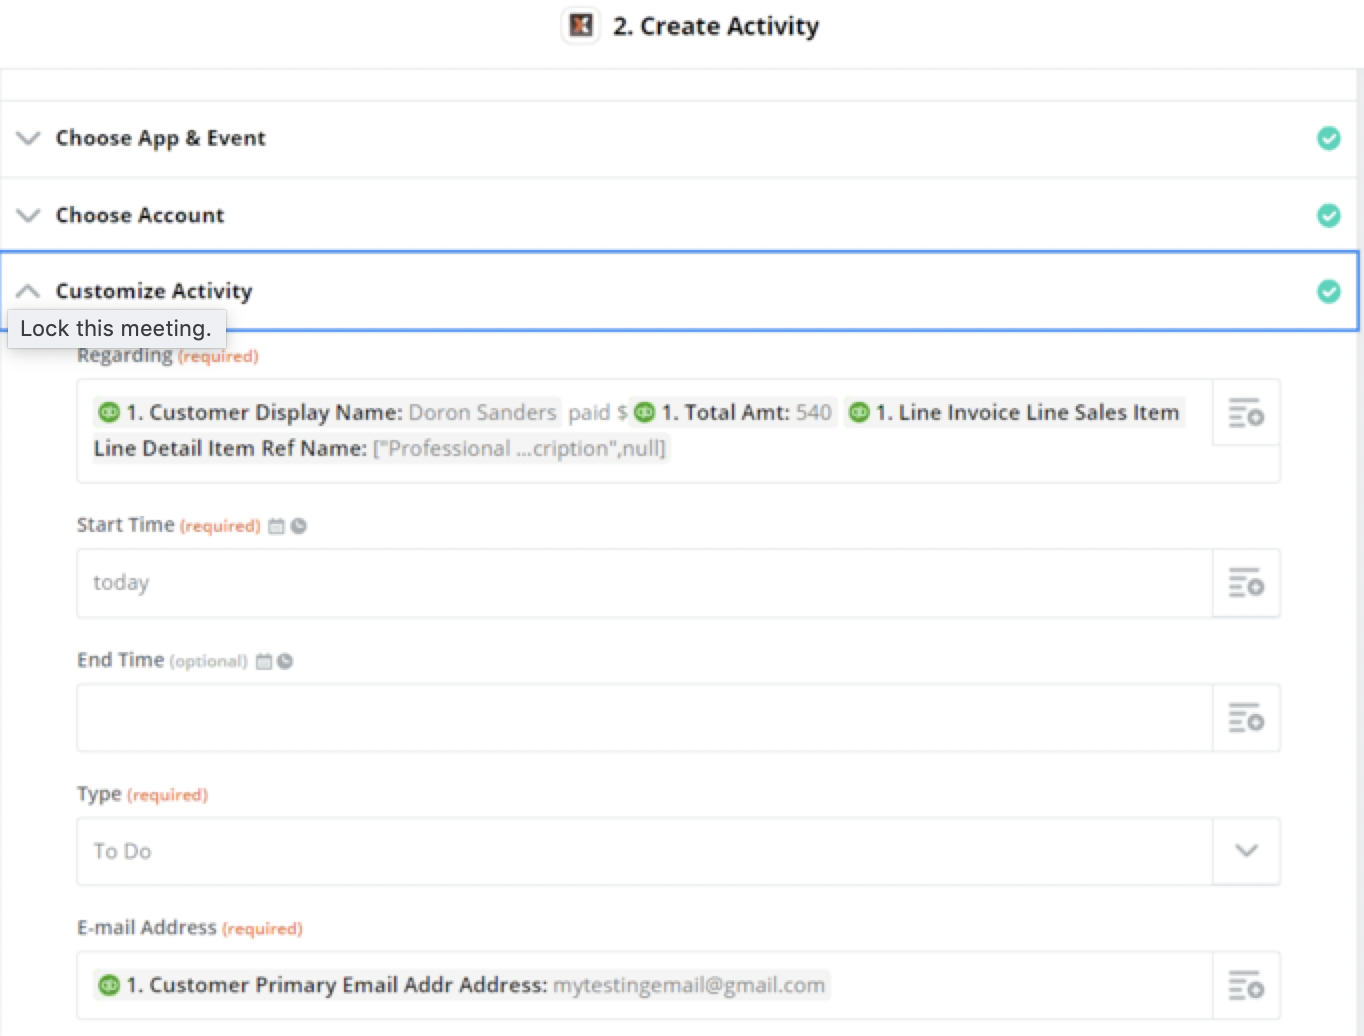
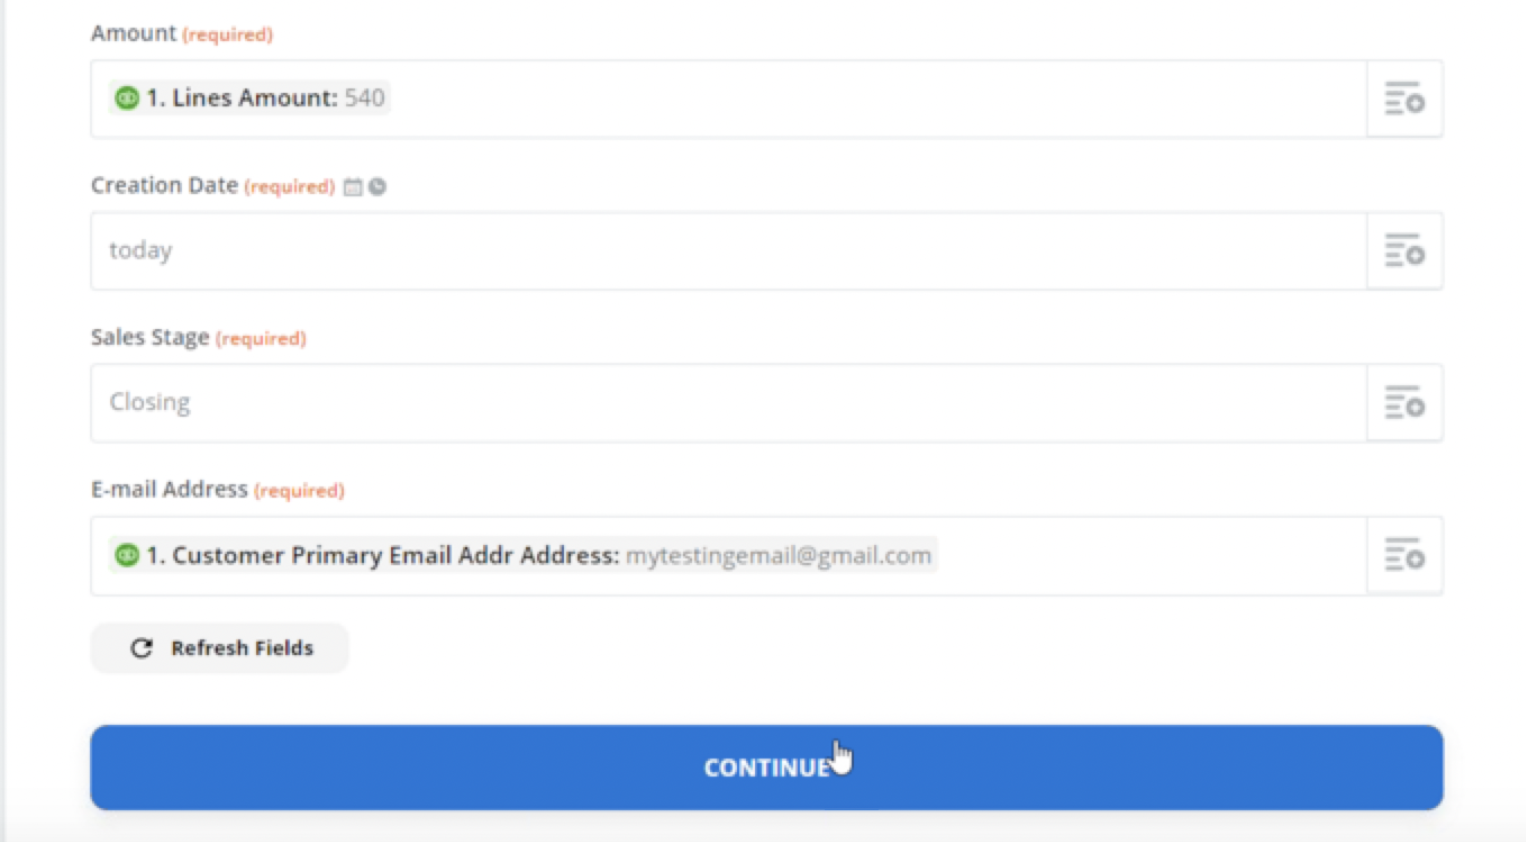
Now it’s time to customize how the task will appear in your task list in SalesNexus! Under “Choose Account, fill in the fields below as shown in the example images.
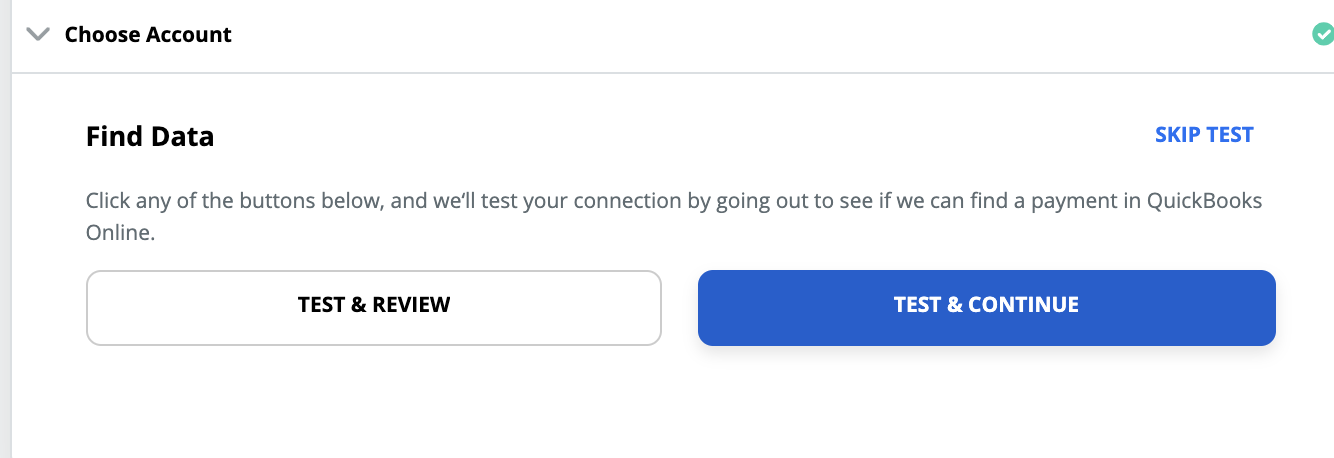
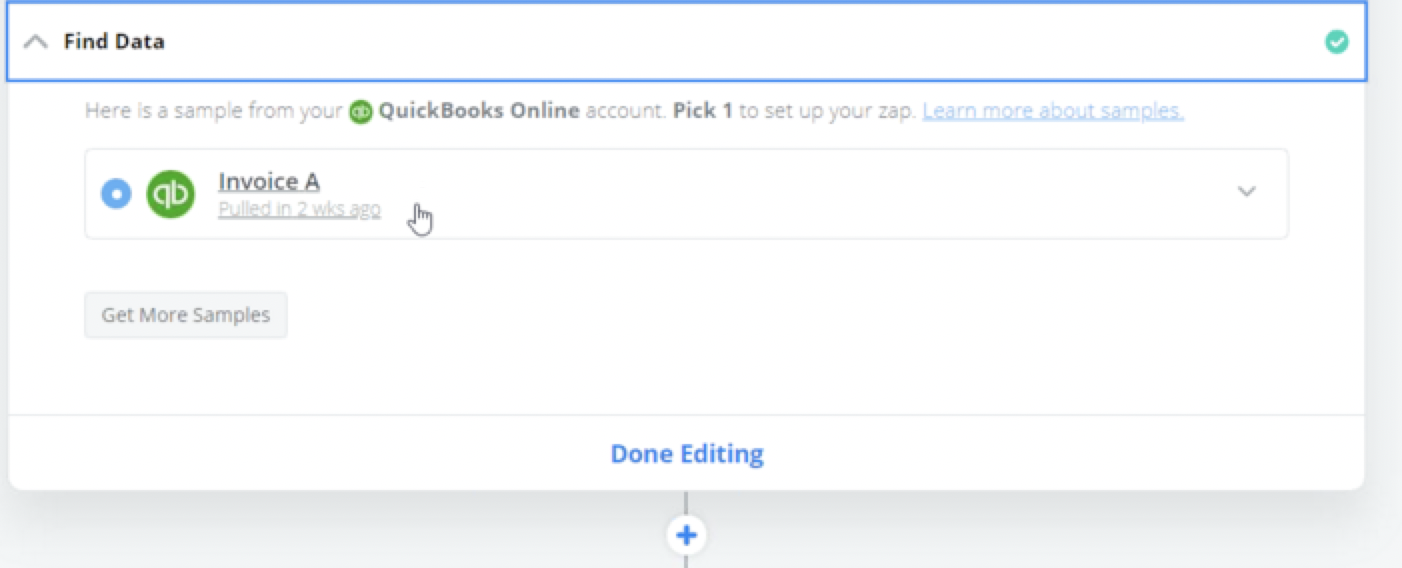
Almost done! Once you’ve clicked continue, Zapier will ask to “Find Data” and bring in some sample invoices that were recently paid from Quickbooks to send to SalesNexus to Test your Zap.
To test your new Zap setup by sending a Test Payment Notification Task to SalesNexus, Under Customize and “Send Data” click “Test and Continue” to move on.

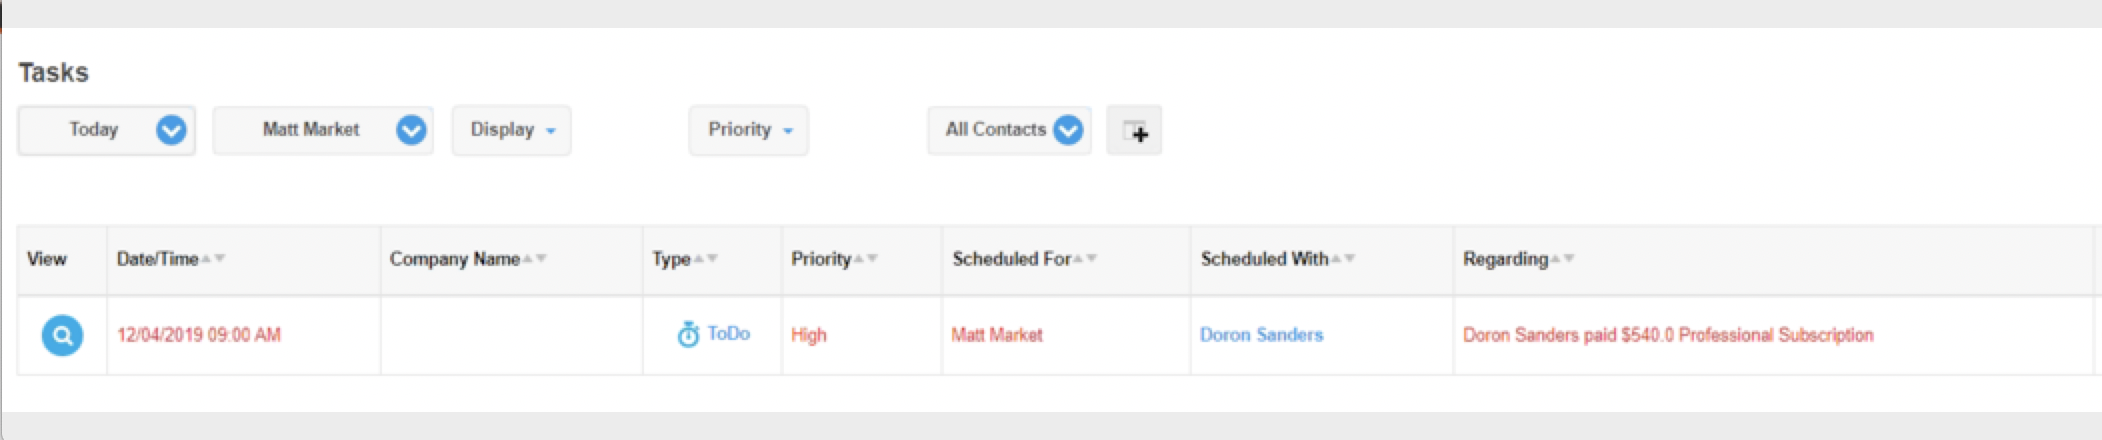
Login to your SalesNexus and check your tasks under Menu > Tasks > View Task List and boom!
An invoice created in Quickbooks, will create a task for you in SalesNexus notifying you of the payment, what it was for, and the $ amount.
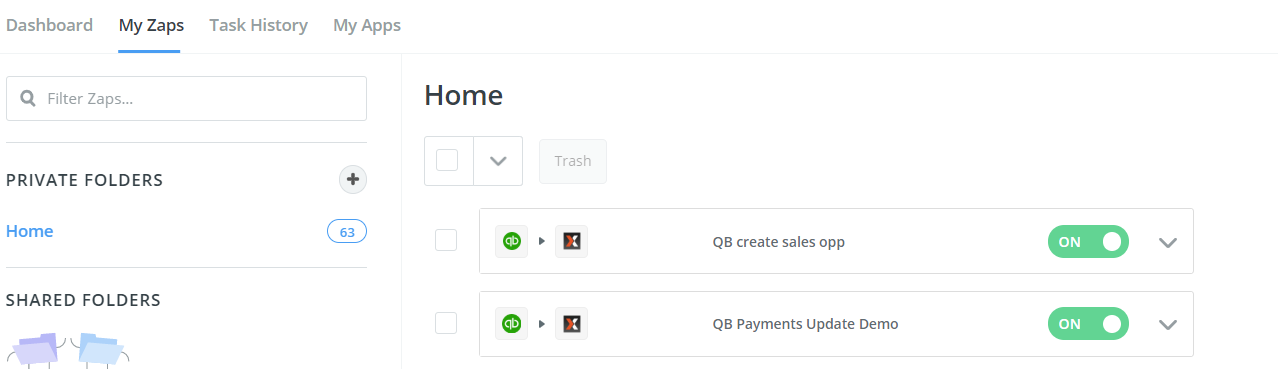
Final Step – Make sure your zap is turned on by going to “My Zaps” in Zapier and ensuring your zap is toggled “on”.